How to Learn CATIA Through Simple Components
Coming from an aerospace engineering background, I began learning CATIA basics for aerospace structures with the goal of understanding the software itself before moving on to complex engineering designs. This blog is for aerospace students and fresh aerospace industry professionals who are interested in mastering CATIA basics through practical exercises involving realistic and comprehensible components.
When I initially began learning CATIA, my focus for the first five months involved creating simple models of mechanical and aerospace parts such as latches, nuts, brackets, springs, nose cones, simple panels, and structural components. Even though these parts seem very simple, these components are ideal for learning fundamental skills such as sketching, constraint management, developing a feature in the correct feature order, manipulating surfaces, and assembling components.
The simplicity of the modeled parts makes it easier to adopt positive modeling practices without getting tangled in complex computations or in-depth analyses.
This is also an important step in gaining confidence in varied workbenches of CATIA while remaining in close proximity to actual aviation-related projects.
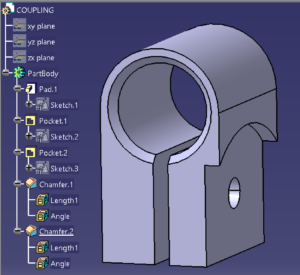 Figure 1. Clean Coupling Tree with Well-Defined Features in CATIA
Step-by-Step Workflow Example
To have a better understanding of my learning method, I have developed a conceptual-level model in which I have taken ISRO’s GSLV Mk-III launch vehicle as an inspiration. The purpose of carrying out this task was not to exactly replicate it but to see how different workbenches of CATIA work together.
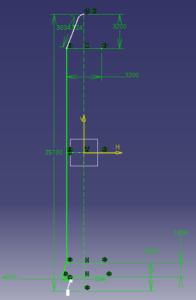 Figure 2.Concept-Level GSLV Mk-III Model
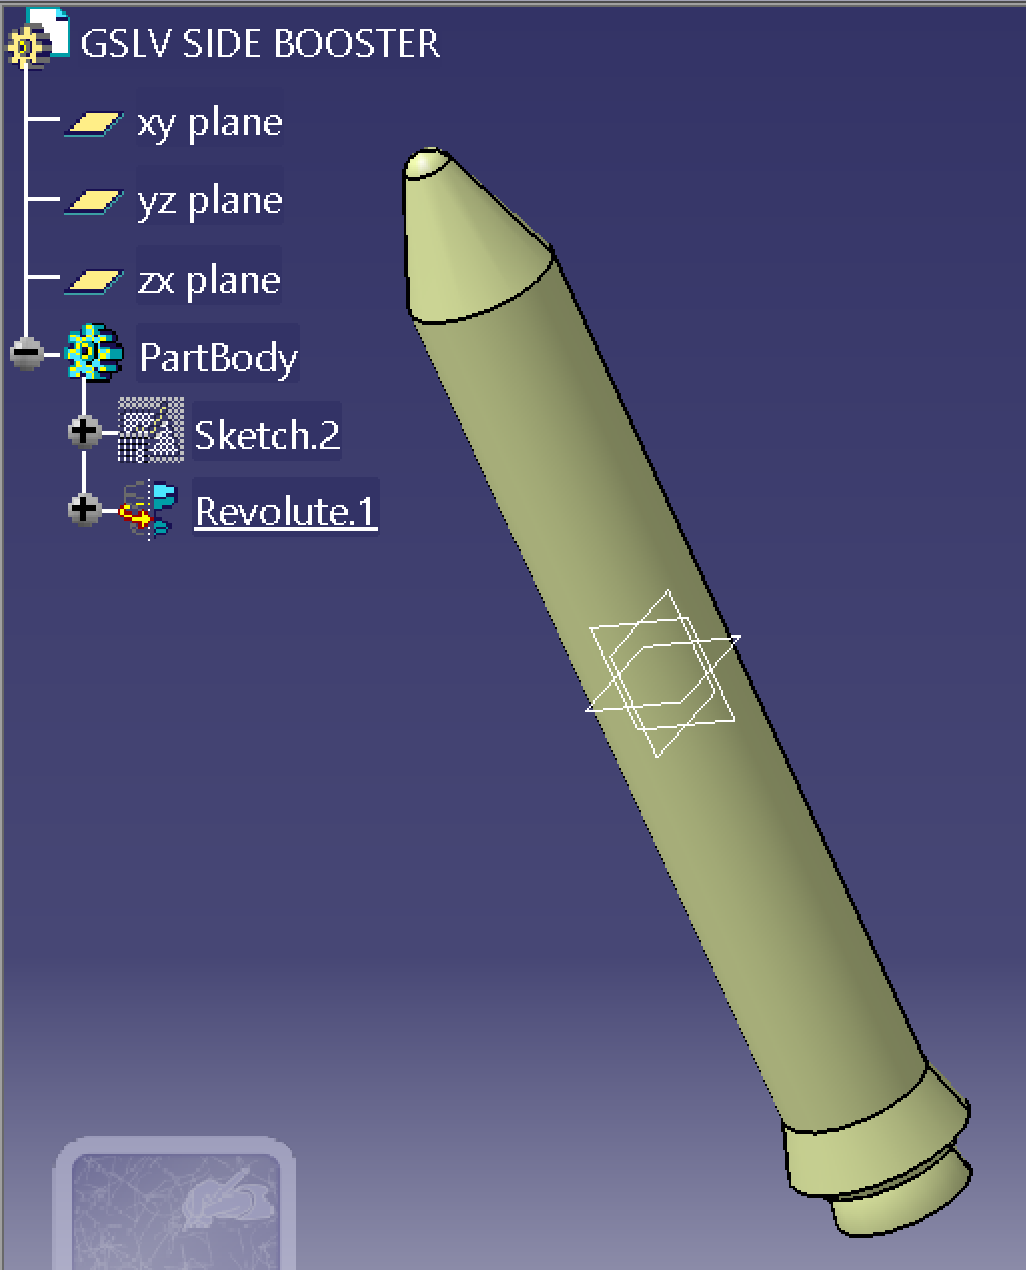
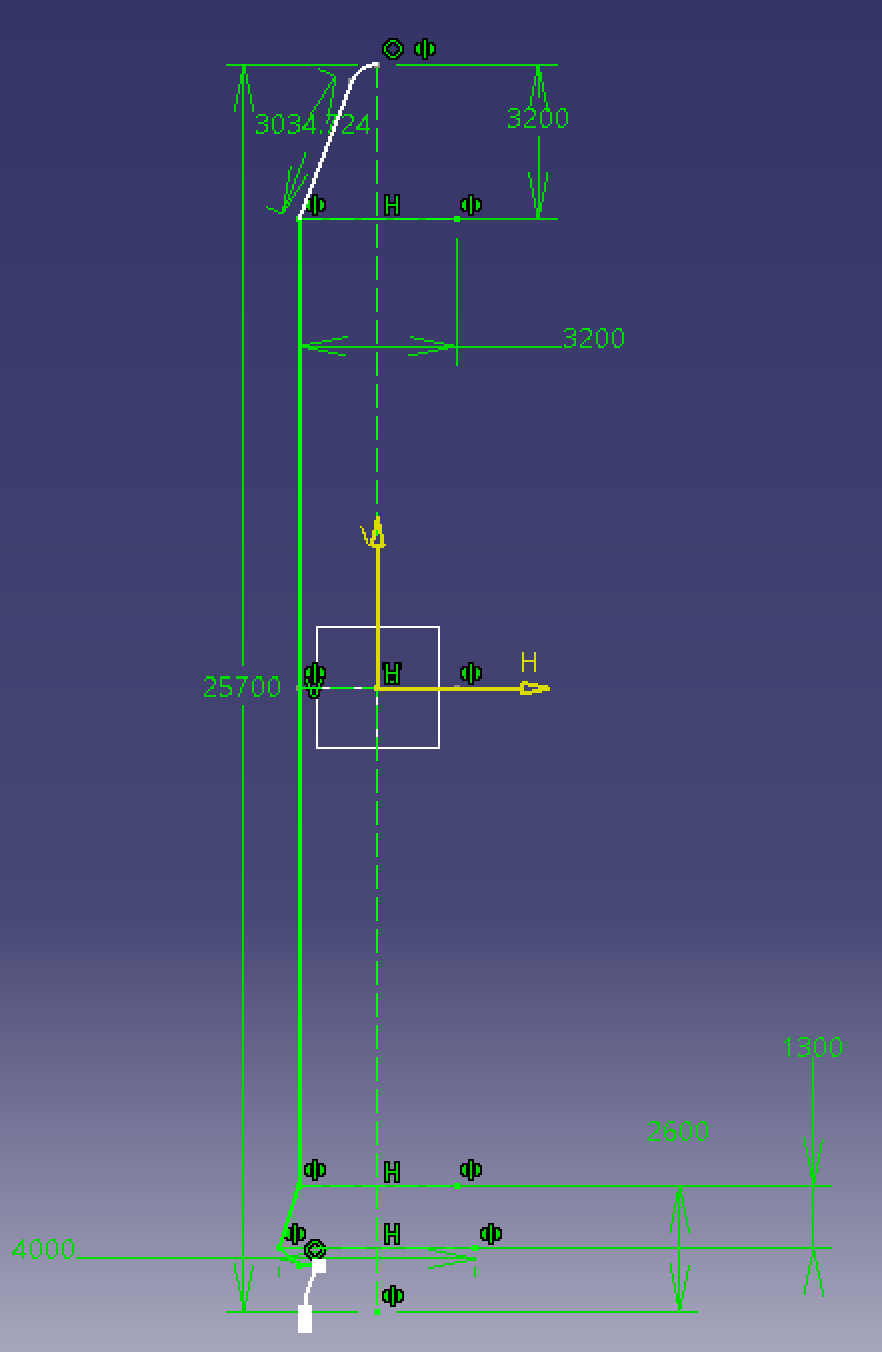
I started with making a sketch in the YZ plane where I drew out the conceptual shape of my rocket. Looking at the initial picture, the constrained shape for the side booster represents its fixed position.
I used CATIA’s “Revolute” function to create a surface by revolving this profile through an angle of 360° about the vertical axis. This created the surface representation of the booster. The same procedure was then followed for creating surfaces for both the main fuselage and the fairing. In fact, it was difficult for me to sketch these profiles because there was not much authentic dimensioning information accessible about this launch vehicle on the internet.
 Figure 3. Revolute Feature in CATIA
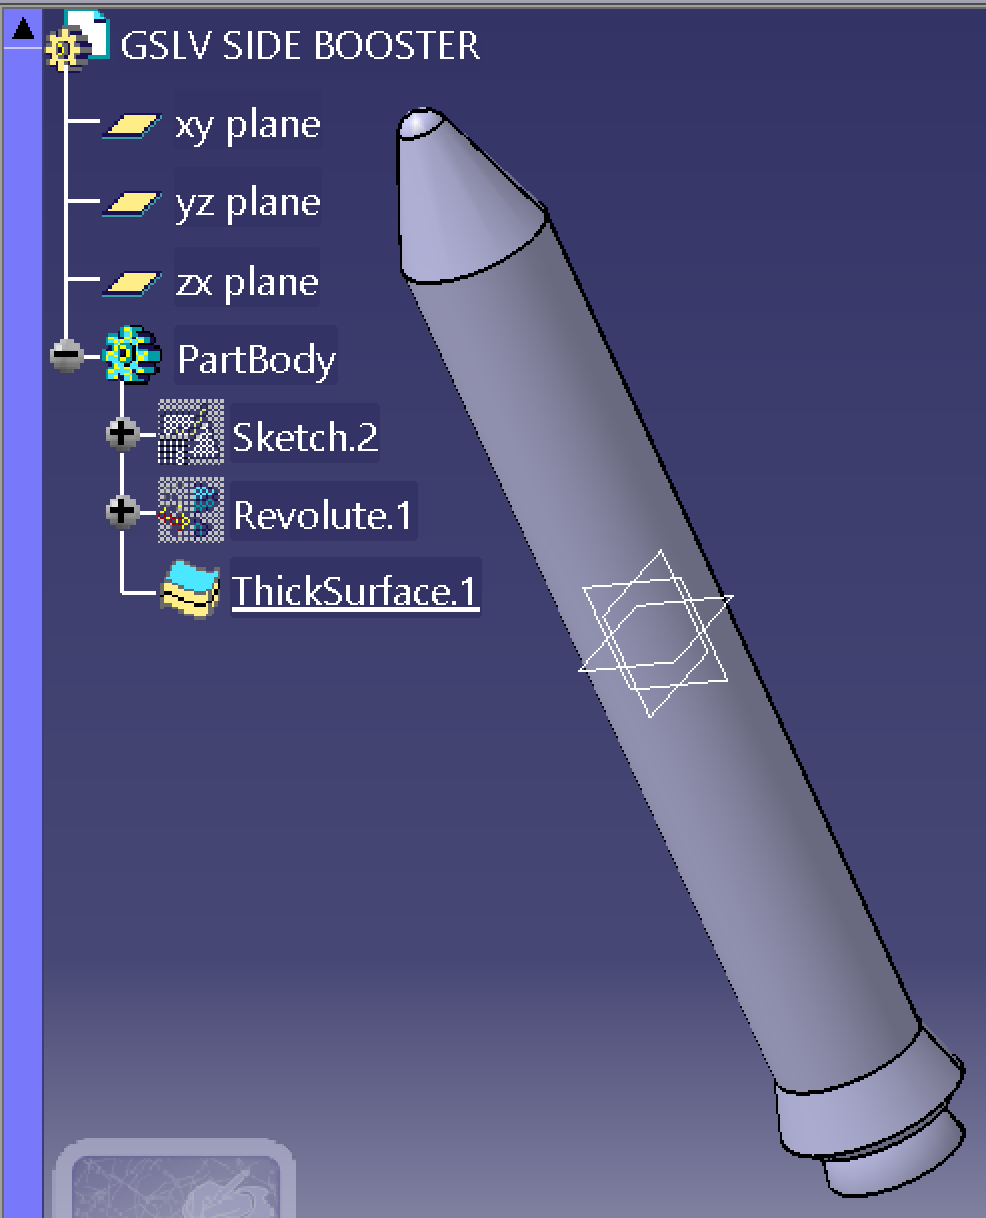
Once the surface models were completed, they were turned into solid bodies by the Thick Surface operation. This method provided consistency in the wall thickness in a manner that was quick and easy to change surfaces into solid geometry.
For repetitive features, like the side boosters, the model resorts to symmetry operations rather than re-modeling for increased efficiency and a cleaner feature tree.
 Figure 4. Thick Surface Operation in CATIA
In general, it appears that this is how the process worked:
Sketch > Surface > Solid
The outcome was a well-organized CATIA model that blended surface modeling and part modeling in such a way as to re-emphasize fundamental modeling concepts while remaining centered on education instead of complexity.
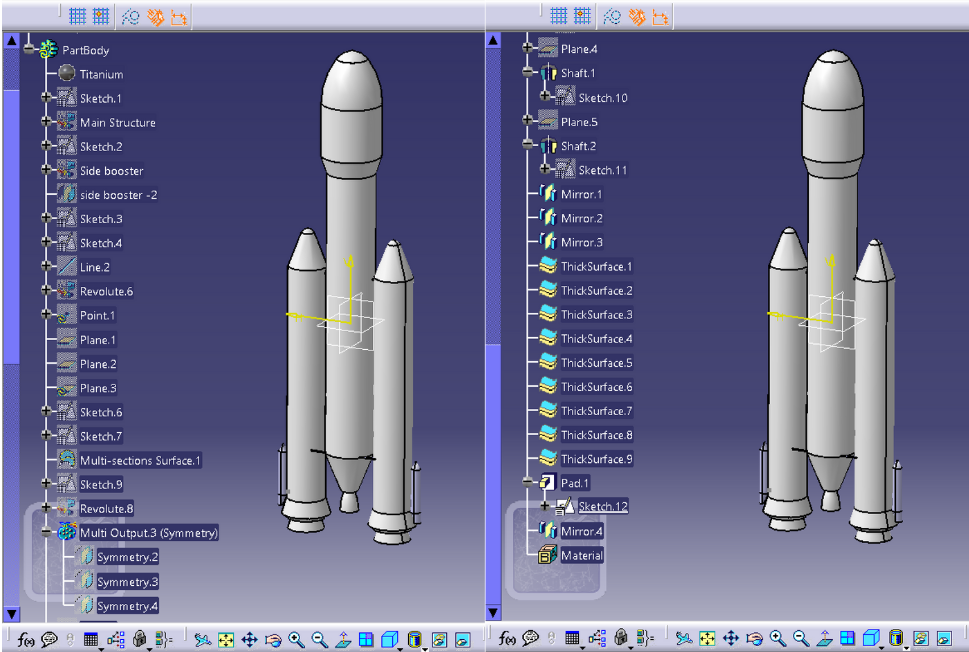 Figure 5. Combined Part Design and Surface Modeling in CATIA
Challenges
When you first begin the learning process in CATIA, the likely issues you’ll find yourself struggling with are: unstable sketches, red features after small changes, and the question of whether to work with solids or surfaces. These issues do not indicate that you are doing anything wrong; they just indicate the normal progression of the learning curve.
One of the toughest things I had to learn was how to use sketch constraints effectively and keep my feature tree organized.
At first, I often created poorly constrained sketches, which led to unexpected results during the modeling process. Over time, I improved my skills and learned to fully exploit CATIA V5’s parametric modeling capabilities, allowing me to implement design changes quickly and efficiently.
Essentially, CATIA is a very competent system for creating geometries, managing parametric relationships, and building assemblies. For a beginner, it is essential to keep in mind that learning about modeling logic, design intent, and workflows is far more important than learning about the verification process and engineering analysis. Such demarcation requirements ensure that a beginner develops a solid foundation without encountering undue difficulties.
Best Practices for Students Learning CATIA
Students should begin with simple geometry in CATIA to develop a strong foundation in sketching and constraints before progressing to more advanced geometries.
This is because a good start in the sketch will eliminate errors in the later modeling stages.
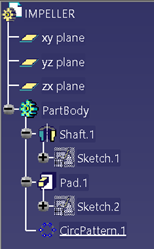 Figure 6. Example of Best Practices in CATIA Feature Tree Organization
A well-structured feature tree is also very important to maintain. This is achieved by naming features correctly, making use of symmetry when it is possible to reduce operations, and avoiding any unnecessary operations. This way, it is very easy to work with models that have an organized feature tree.
This is an area where beginners will often miss this best practice early on. This leads to having all these features in an unstructured list form, making it very hard, or even impossible, to organize later on. Getting in good habits early is an important difference when it comes to handling complexity.
Conclusion:
Learning CATIA through simple components helps students build strong CAD fundamentals without overwhelming them with complex engineering concepts. Consistent practice with practical mechanical and aerospace parts develops confidence in part design, assemblies, and surface modeling while reinforcing design intent and modeling logic. With a structured learning approach, CATIA becomes a powerful tool not only for academic work but also for real-world aerospace design and future engineering careers.
Akshit Bhardwaj is an Aerospace Engineering undergraduate with a strong interest in computer-aided design and engineering-driven product development. He actively works with CATIA and the 3DEXPERIENCE platform, focusing on building solid CAD fundamentals through practical part design, assemblies, surfacing, and sheet metal modeling. With a growing inclination toward aerospace structures and real-world engineering applications, he emphasizes the importance of combining engineering core concepts with CAD tools to achieve meaningful and functional designs.
Latest posts by Akshit Bhardwaj
(see all)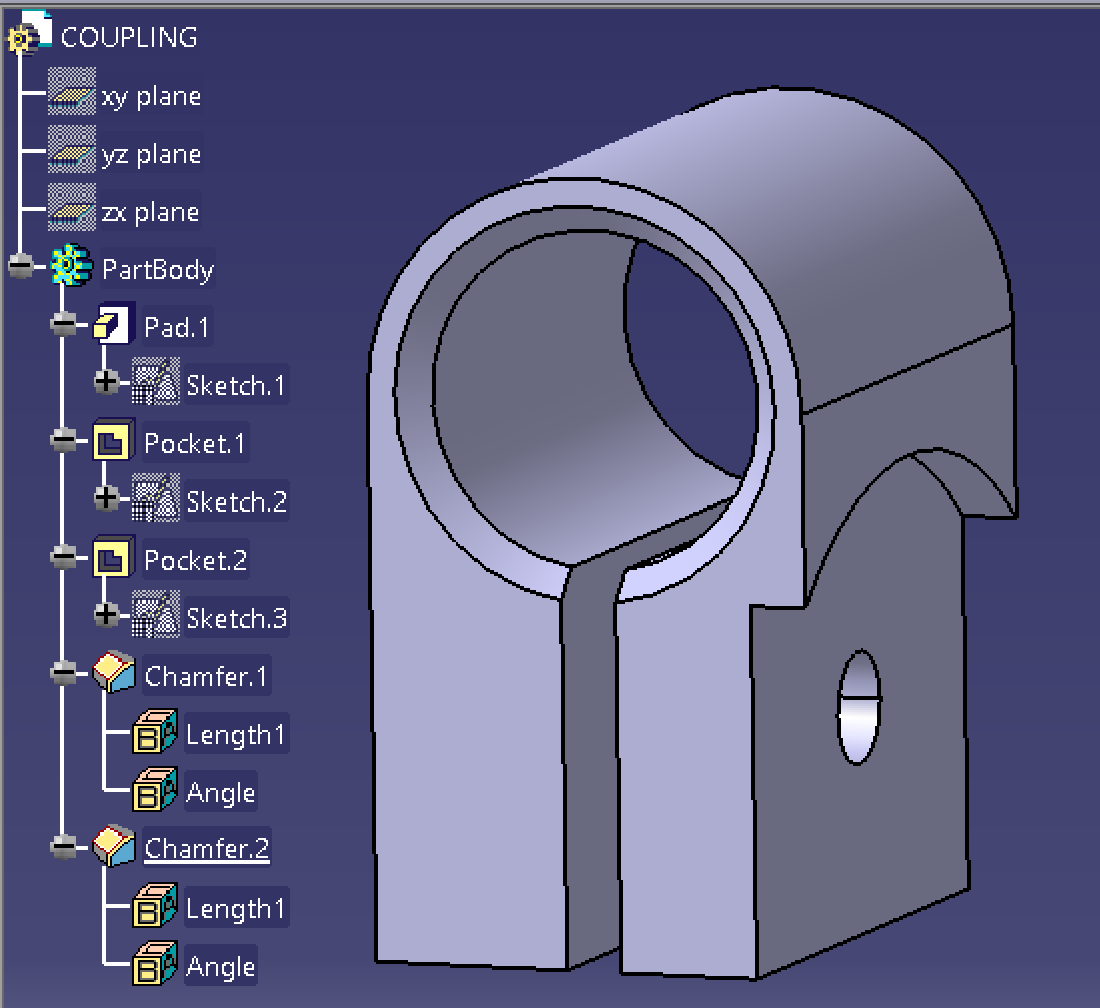


