
© 2023 Created by blog.championxperience.com
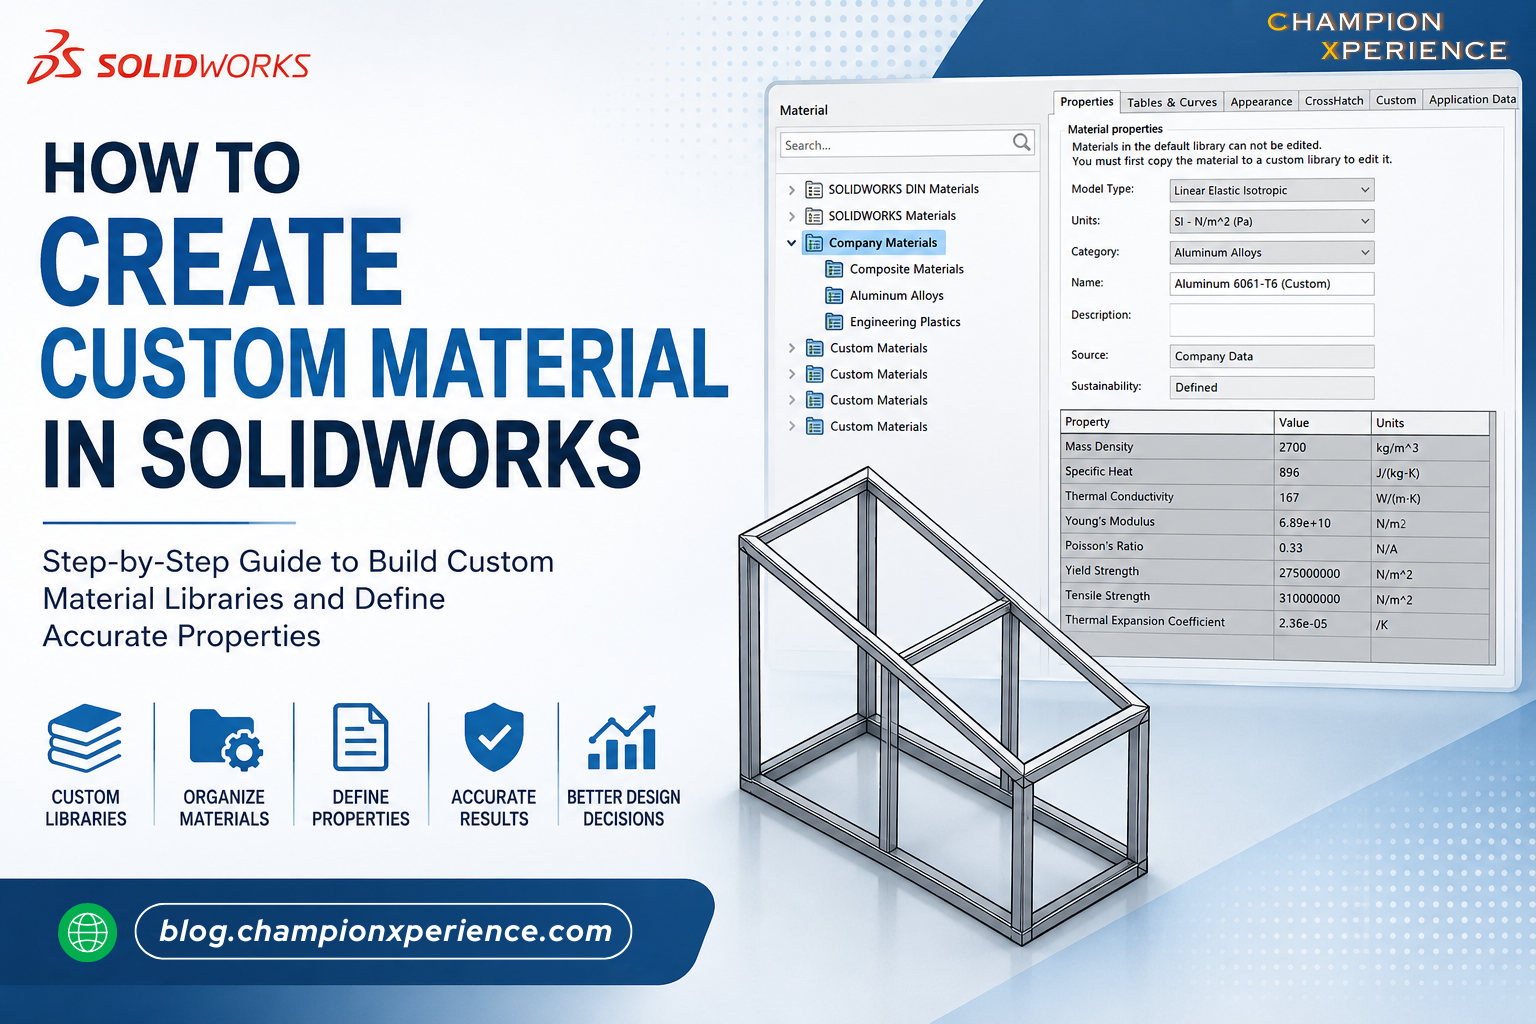
In mechanical design, using the correct material is not only about appearance. Material properties directly affect part weight, simulation accuracy, manufacturing decisions, and cost estimation.
Although SOLIDWORKS includes a large built-in material database, engineers often work with supplier-specific materials, modified plastics, custom alloys, or 3D printing materials that are not available in the default library.
This guide explains how to create and manage custom materials in SOLIDWORKS using a practical engineering workflow.
Why Create Custom Materials?
Custom materials in SOLIDWORKS are useful when the standard material library does not contain the material you need. Many companies use special plastics, aluminum alloys, composite materials, or 3D printing materials that are not included in the default database.
Creating custom materials helps engineers use correct material information in their designs and simulations. This is important for getting accurate part weight, strength, and manufacturing data.
Custom materials are often used when a supplier provides special material properties, when existing materials do not match the required values, or when a company wants to use its own standard material library.
Using accurate material properties improves mass calculations, center of gravity accuracy, simulation results, BOM consistency, and manufacturing documentation.
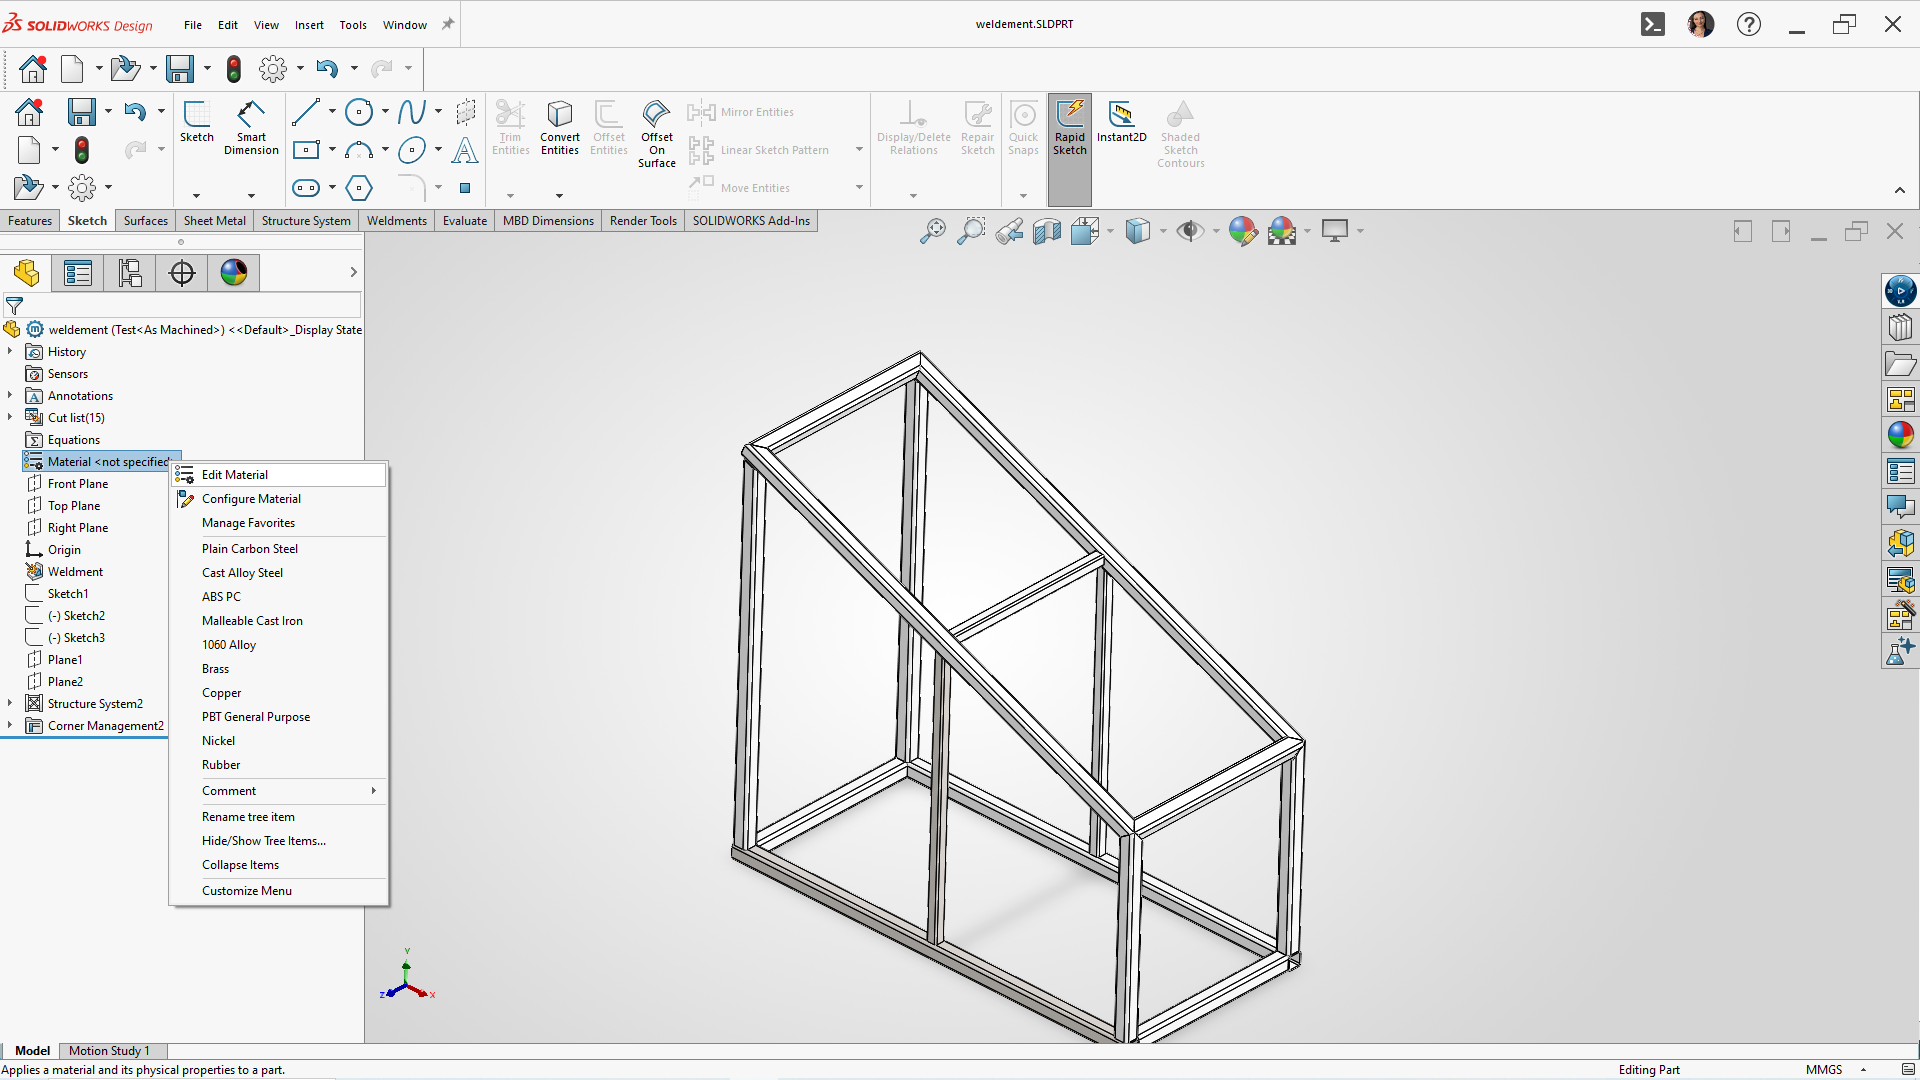
Step 1 — Open the Material Editor
Open a part file in SOLIDWORKS.
In the FeatureManager Design Tree:
- Right-click Material
- Select Edit Material
This opens the Material Database window where all libraries, categories, and materials are stored.
Step 2 — Create a New Material Library
Instead of editing default SOLIDWORKS materials, create your own library.
In the left panel:
- Scroll to Custom Materials
- Right-click and choose New Library
- Give the library a clear name
Example:
- Company Materials
- Custom Plastics
- 3D Printing Materials
After creating the library:
- Right-click the library
- Select New Category
Example categories:
- Engineering Plastics
- Aluminum Alloys
- Composite Materials
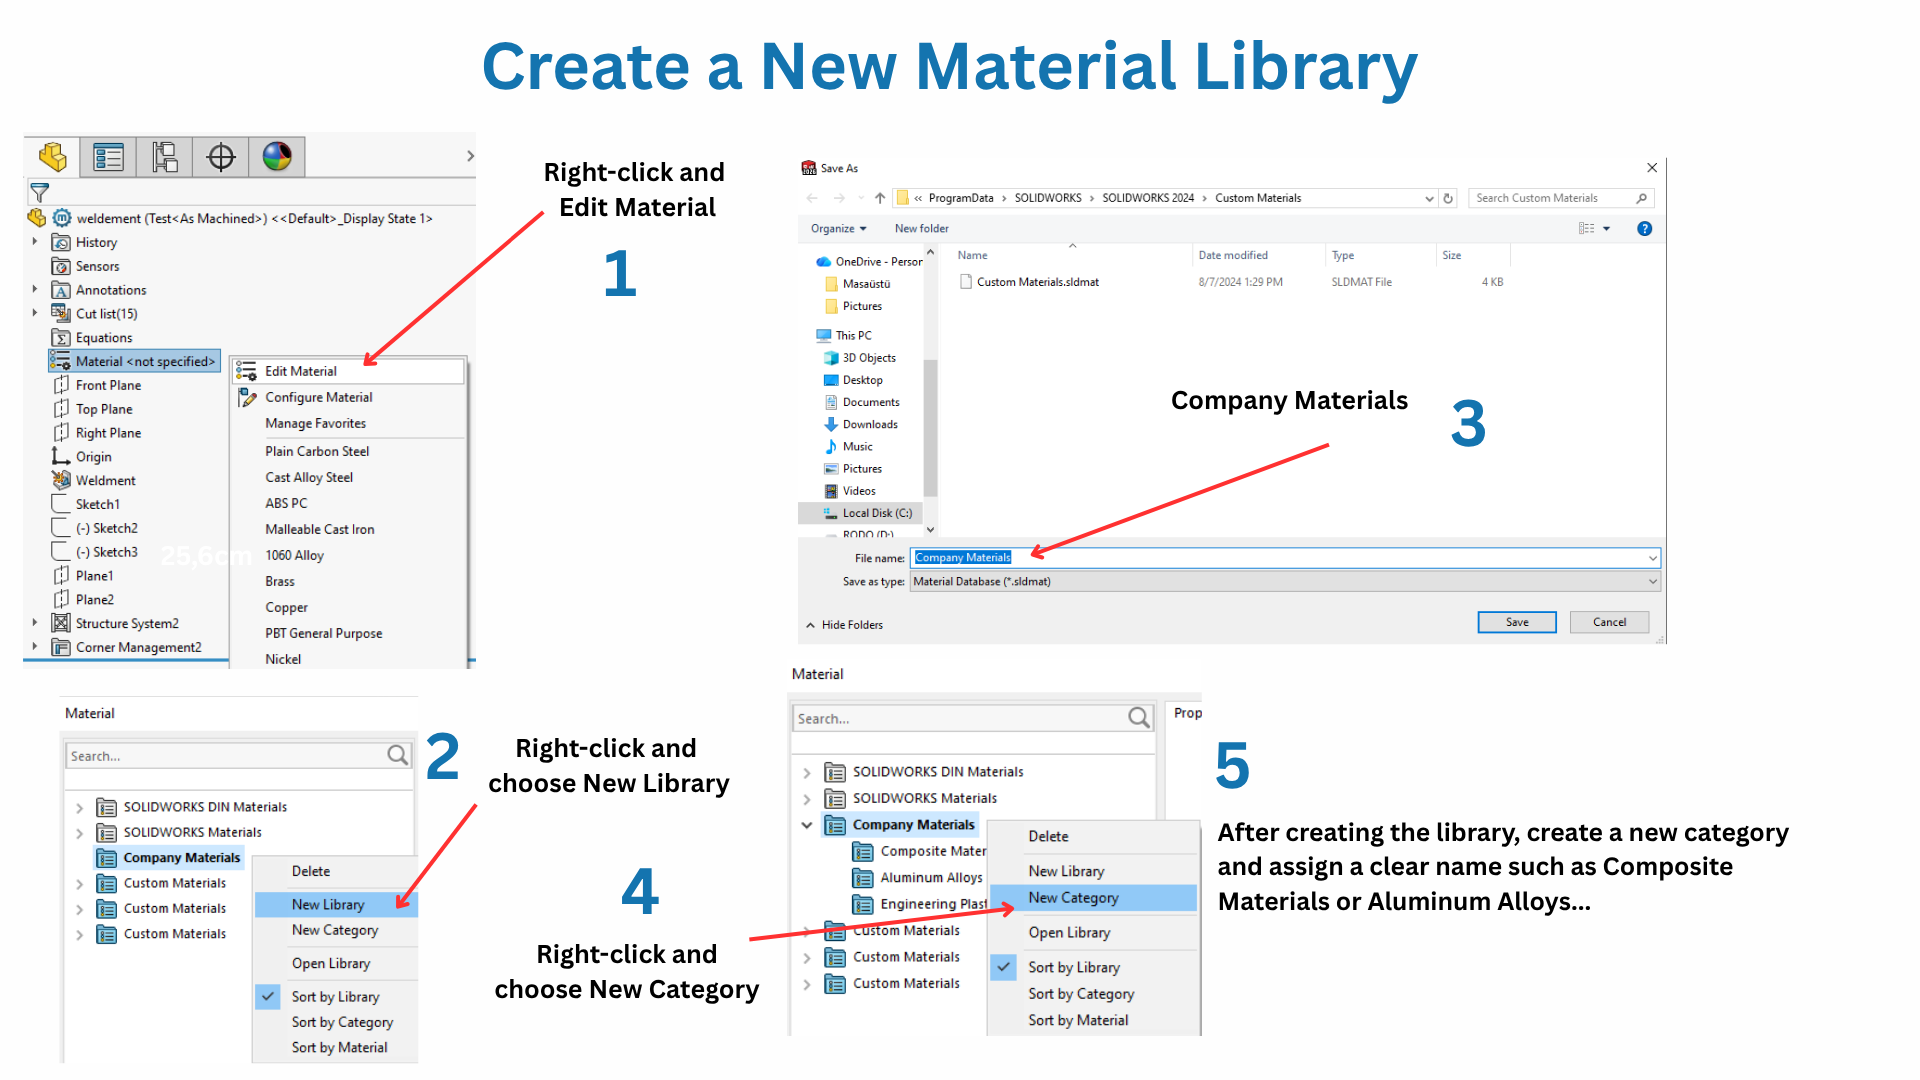
This structure keeps materials organized for future projects.
Step 3 — Create a New Material
There are two common methods engineers use.
Method 1 — Copy an Existing Material (Recommended)
This is the fastest workflow because it preserves:
- Appearance settings
- Basic physical properties
- Material classifications
Example:
If you need a modified 1060 Alloy, copy the existing Alloy material first.
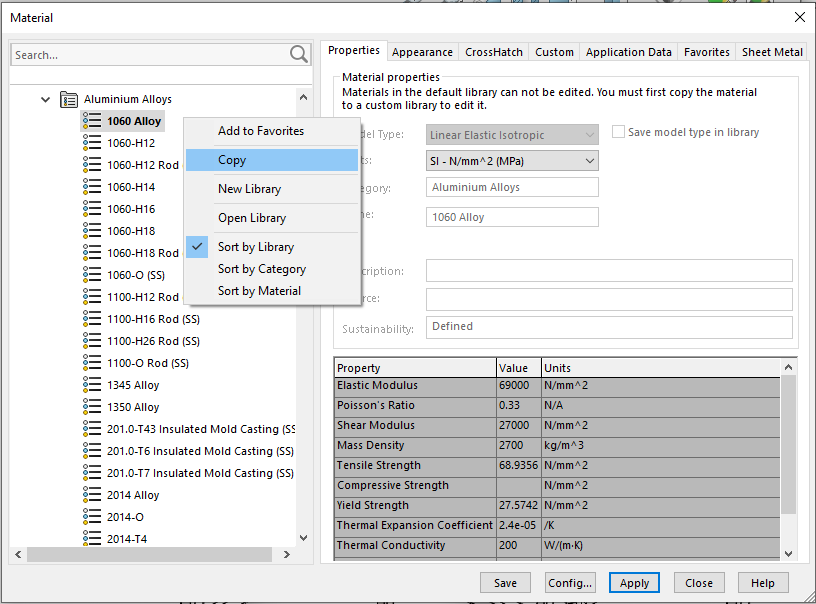
Steps:
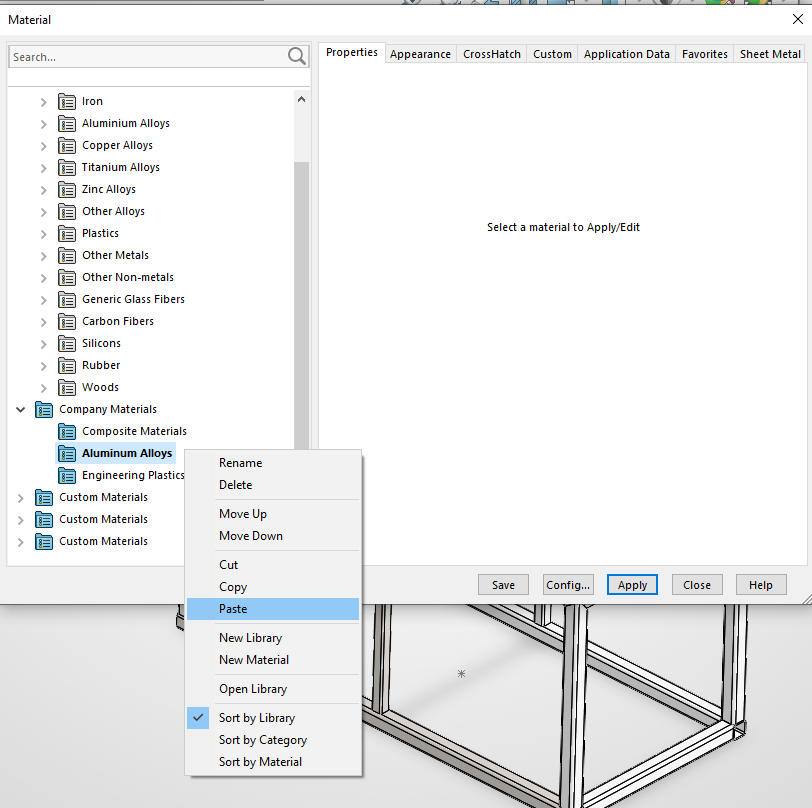
- Select an existing material
- Right-click → Copy
- Right-click your custom category → Paste
Rename the material afterward.
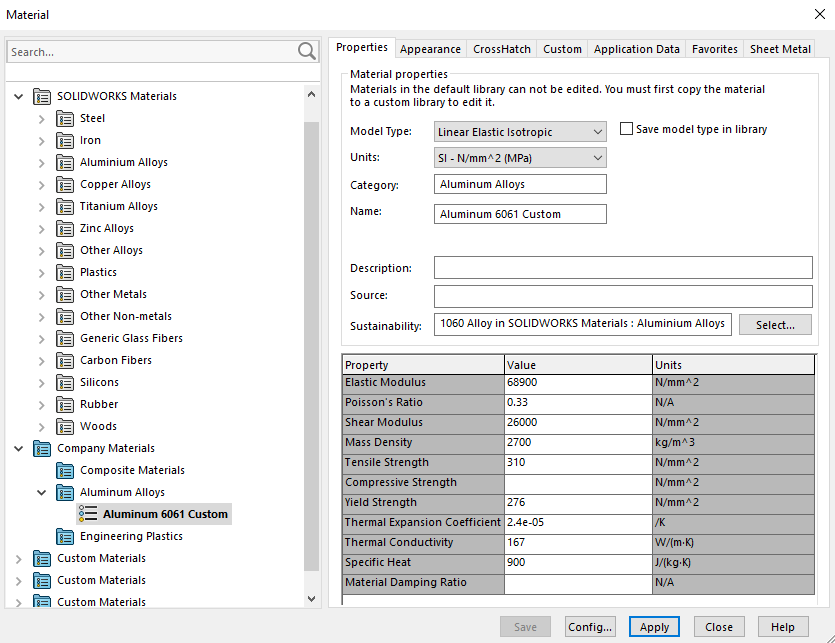
Example:
- Aluminum 6061 Custom
Method 2 — Create a Material from Scratch
If no similar material exists:
- Right-click the category
- Select New Material
This creates an empty material entry where all properties must be entered manually.
Step 4 — Define Material Properties
Step 5 — Apply the Material
Click Apply and then Close.
The custom material is now assigned to the part.
Once applied, SOLIDWORKS automatically updates:
- Mass properties
- Material appearance
- Simulation data
- BOM material definitions
Sharing Custom Material Libraries
Custom materials are stored as .sldmat files.
Default location example:
C:\Program Files\SOLIDWORKS Corp\SOLIDWORKS\lang\english\sldmaterials
For engineering teams, storing material libraries in a shared location is recommended.
Common options include:
- Shared network folders
- PDM vaults
- Cloud-managed engineering folders
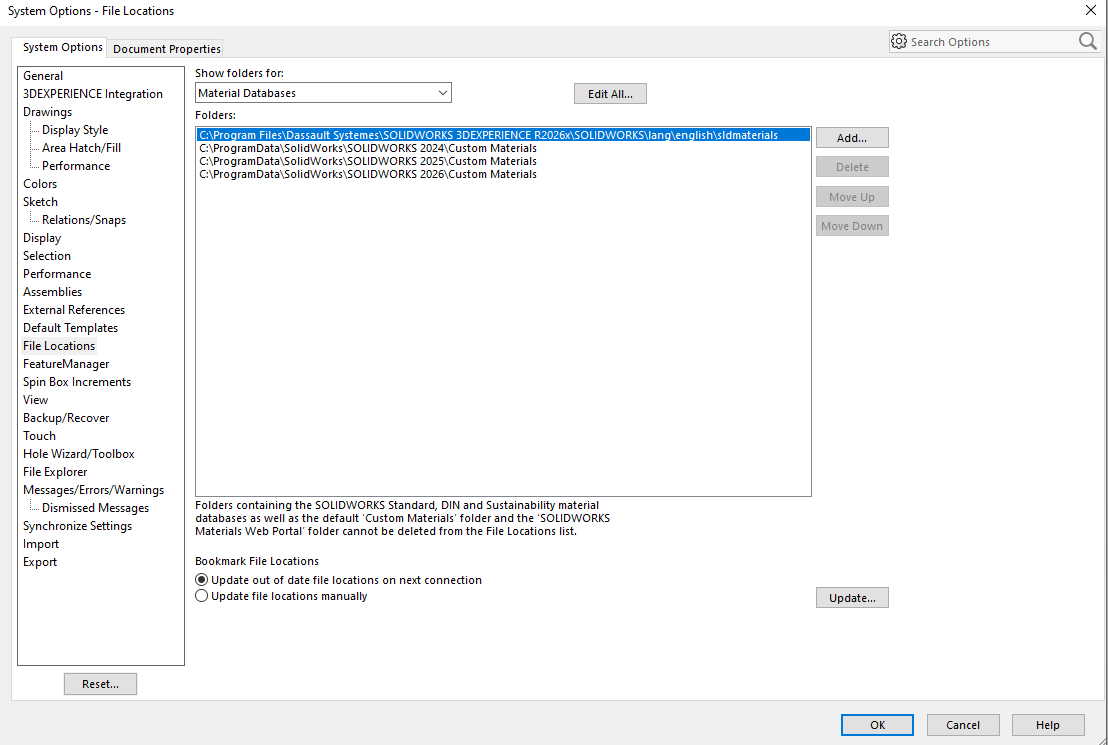
To add a shared library:
- Go to Tools → Options
- Open File Locations
- Select Material Databases
- Add the shared folder path
This ensures all users work with the same validated material data.
Engineering Best Practices
Use Real Supplier Data
Whenever possible, use manufacturer datasheets instead of estimated values.
Standardize Naming
Use clear naming conventions such as:
- Steel AISI 1045
- ABS Injection Molded
- PETG Carbon Fiber
Keep Libraries Organized
Separate materials by:
- Manufacturing method
- Industry standard
- Material family
Backup Material Libraries
Since .sldmat files contain company-specific data, regular backups are important.
Final Thoughts
Creating custom materials in SOLIDWORKS is a simple process, but it has a major impact on engineering accuracy and workflow consistency.
A properly managed material library improves:
- Simulation reliability
- Manufacturing communication
- Design standardization
For companies working with specialized materials or production workflows, custom material libraries quickly become an essential part of the CAD environment.
Sales Development Representative at ChampionXperience
Hanen Bdioui is the Editor-in-Chief at ChampionXperience, where she leads content on CAD, VR, and emerging engineering technologies. She works with Dassault Systèmes as a Content Creator and SOLIDWORKS Application Engineer, and contributes as a technical writer for Engineering.com and EngineeRules, covering topics in CAD, PLM, and simulation. Hanen also creates specialized content for 3DEXCITE, the 3DEXPERIENCE platform, and Onshape, supporting engineers and companies in adopting modern digital workflows.
Latest posts by Hanen Bdioui (see all)
- How to Create a Custom Material in SOLIDWORKS - 15 May 2026
- Onshape MBD: All in One Place for Design, GD&T and Manufacturing - 18 April 2026
- MySession Missing in SOLIDWORKS Design? Fix It in Less Than 1 Minute - 6 March 2026
Subscribe
0 Comments
Oldest
